Building a home automation system using open-source hardware and software creates the need to use great, preferably open-source, platforms. Whatever you set up has to tick a key number of boxes;
- local hosting for better privacy
- open source to keep costs down and to also ensure that the platform's security is frequently analysed
- active development so that you don't have to worry about future integrations of new products / technologies you buy
- well-tested; you don't want to be amongst a small number of users
The most popular hardware / software combination that ticks all these boxes is, without a doubt, Home Assistant installed atop of Raspberry Pi. In this guide, we'll take you through the steps of exactly this installation.
There are two ways to appraoch the installation. The first is exclusively installing Home Assistant Operating System upon a Raspberry Pi - that means that the Raspberry Pi has a single purpose: acting as a server to manage your automation system. Alternatively, it's possible to install Home Assistant using its Container and Docker. This secondary method is recommended when you want to run other software on your Raspberry Pi and not just Home Assistant. There are limitations to using Container and Docker, however, namely that it is much more difficult to apply updates to Home Assistant and install Home Assistant add-ons.
We break down both installation methods below.
What you'll need
- Raspberry Pi 3 or greater, and associated accessories such as the power supply and ethernet cable. As of 2022, Raspberry Pi 4 is recommended in order to future proof your installation
- A micro SD card at least 32GB and class 2. We recommend 128GB if you'll be using Home Assistant with non-Z-Wave features including video cameras or audio recordings
In this guide we have used Home Assistant OS version 8.3. Potentially, by the time you follow this guide, some screens may have been redesigned or a some steps subtly changed as new version have been released. Should the changes be major, please let us know so that we can update the guide in order to make things smoother for others.
Two installation methods
Install Home Assistant Operating System
Installing Home Assistant OS on your Raspberry Pi is the preferred way to run Home Assistant. While it means that your Raspberry Pi becomes a dedicated home automation server, you'll have an easier time of keeping Home Assistant up-to-date add installing various add-ons to expand its functionality.
- Download balenaEtcher and install for your main computer system (be that Linux, macOS or Windows).
- Plug your empty micro SD card into your main computer.
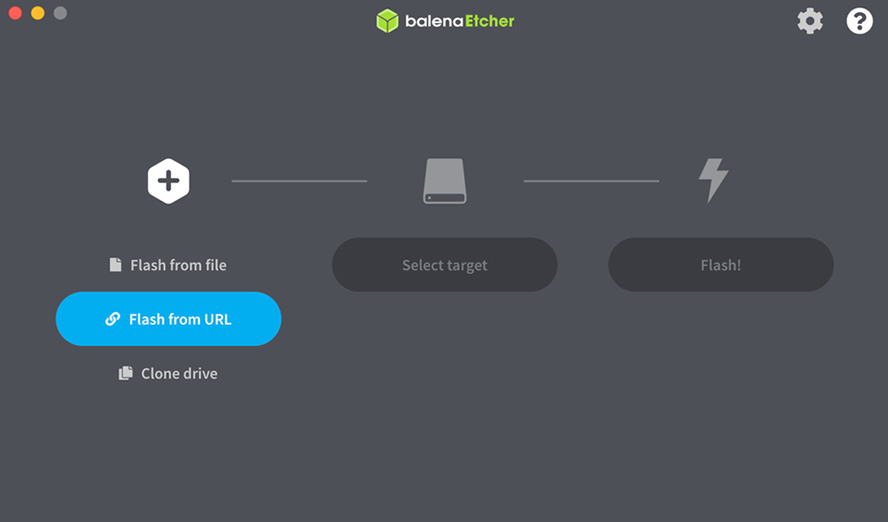
- Open balenaEtcher and click "Flash from URL".
Enter the full, Home Assistant OS download URL which corresponds to your selected Raspberry Pi platform. E.g. you will enter a URL such as 'https://github.com/home-assistant/operating-system/releases/download/8.3/haos_rpi4-64-8.3.img.xz' into balenaEtcher.
You can find the latest version's URL at Github under "Assets". Alternate-click on the appropriate filename within your brower and copy the full download URL to your clipboard. In these example filenames, the version has been replaced with X.X where X.X is the latest version e.g. haos_rpi3-8.3.img.xz
Raspberry Pi 3 32-bit ‐ haos_rpi3-X.X.img.xz
Raspberry Pi 3 64-bit ‐ haos_rpi3-64-X.X.img.xz
Raspberry Pi 4 32-bit ‐ haos_rpi4-X.X.img.xz
Raspberry Pi 4 64-bit ‐ haos_rpi4-64-X.X.img.xz
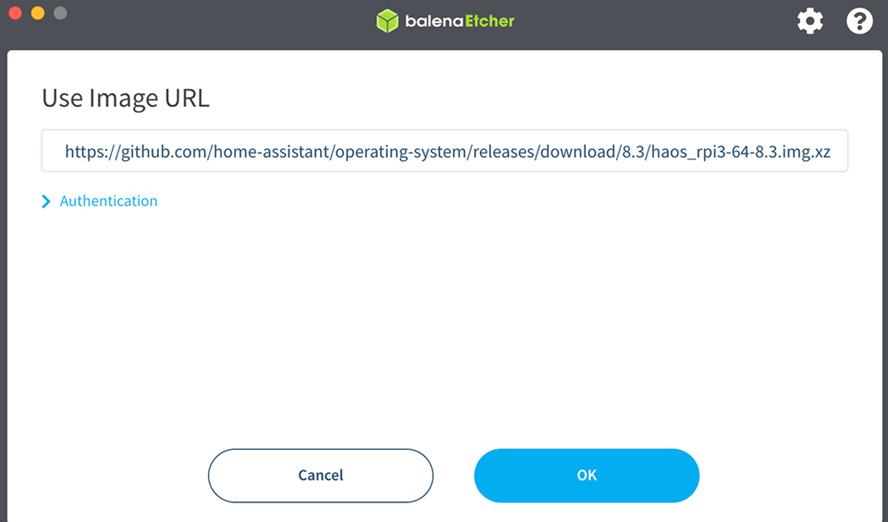
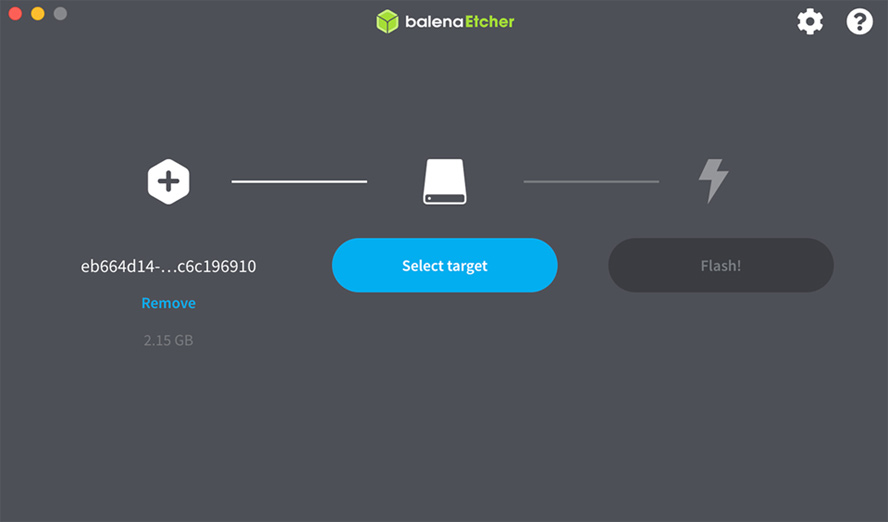
- After entering the URL, click "OK"; it can take some time to download the file from Github.
- Click "Select target".
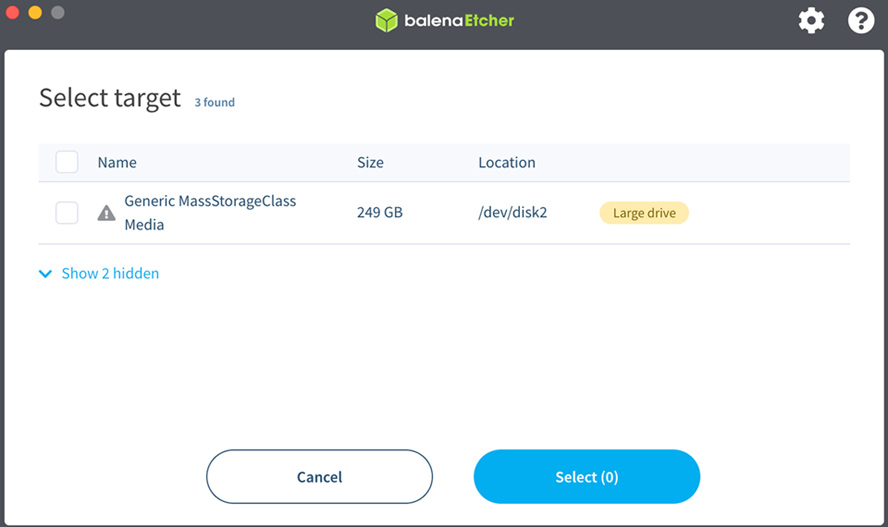
- Select your SD Card from the list under "Select the target". Click "Select".
- Click "Flash!".
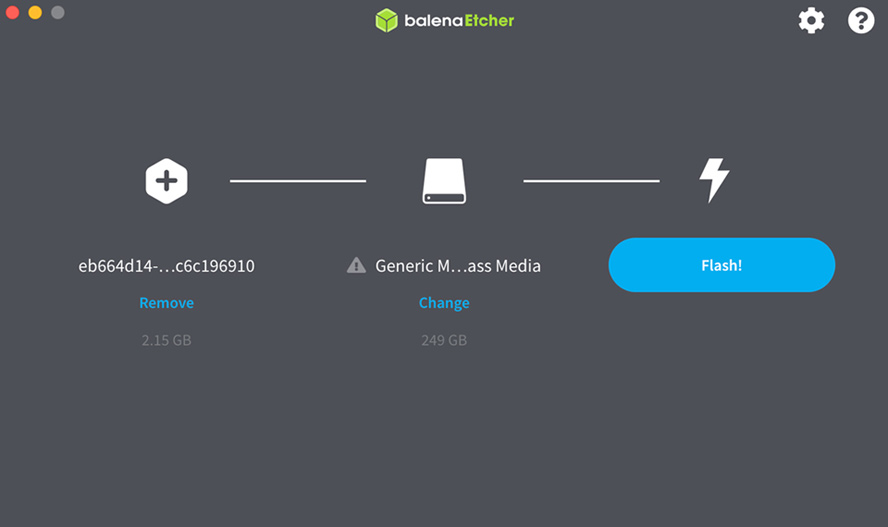
- If your micro SD has a large capacity, you'll receive a warning. Double check that you correctly selected your micro SD then click "Yes, I'm sure."

- Address any further requests, such as access permissions, that your computer or balenaEtcher makes of you in order to complete the process.
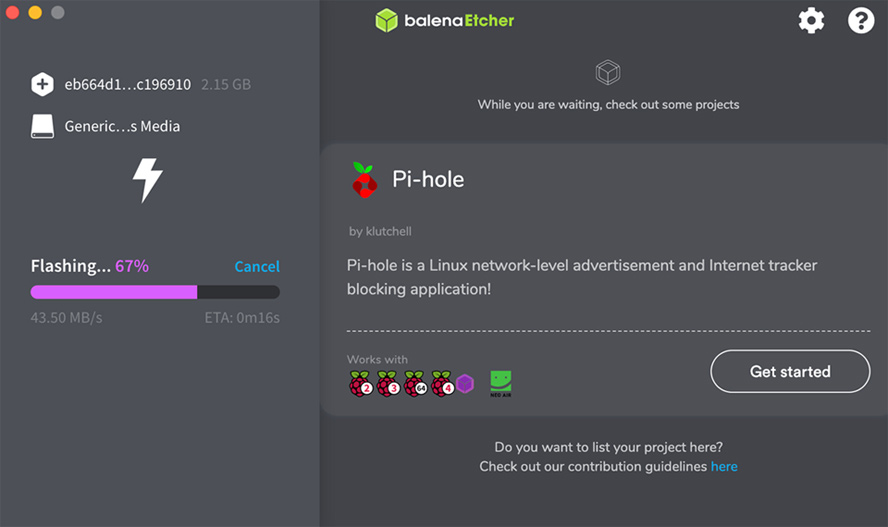
- Wait for the process to finish. Safely unmount the micro SD card. Close balenaEtcher.

- Start your Raspberry Pi
- Remove the micro SD from your main computer.
- Insert the micro SD into your Raspberry Pi.
- Plug the Ethernet cable into your Raspberry Pi and Ethernet network.
- Plug the power cable into your Raspberry Pi and a power outlet. The Raspberry Pi will now power up.
- After about 2 minutes, your Raspberry Pi should have booted up and into Home Assistant OS. Confirm this using your main computer and by using a browser to visit the default URL for Home Assistant OS: http://homeassistant.local:8123
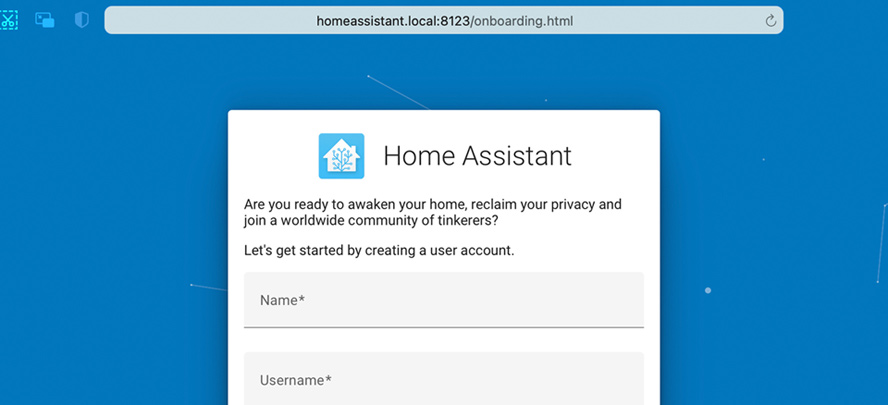
Home Assistant OS is now installed and you can proceed to create an account and follow the in-browser prompts to complete installation.
Next step: setup Z-Wave Plus
Once you have completed installation of Home Assistant OS your browser will take you to the Home Assistant dashboard. Now it's time to install autiomation functionality within Home Assistant. To do that, you'll need to setup Z-Wave 800 series with Home Assistant. Follow that link for our step-by-step guide.
Install Home Assistant using its Container and Docker
Install Home Assistant in a Docker container allows you to use the Pi for other purposes as well. It's a more complicated installation and can make operation more challenging.
- Install Raspbian on the micro SD card
- Download Raspberry Pi Imager and install for your main computer system (be that macOS, Ubuntu or Windows).
- Plug your empty micro SD card into your main computer.
- Within Imager click "Choose OS".
- Select "Raspberry Pi OS (other)".
- Select "Choose Raspberry Pi OS Lite (32bit)".
- Choose "Raspberry Pi OS Lite (32bit)".
- Click "Choose Storage".
- Select your micro SD card from the list.
- Click "Write".
- You will receiving a warning that all data will be removed from the micro SD. Click "Ok".
- Wait until the process is finished.
- Enable SSH on Raspian
- Open the micro SD in a file browser such as Windows Explorer.
- In the root directory, create a new text file and name it "SSH". Ensure the filename has no extension.
- Start your Raspberry Pi
- Remove the micro SD from your main computer.
- Insert the micro SD into your Raspberry Pi.
- Plug the Ethernet cable into your Raspberry Pi and Ethernet network.
- Plug the power cable into your Raspberry Pi and a power outlet. The Raspberry Pi will now power up.
- Connect your Raspberry Pi
- Open the SSH client on your main computer.
- Run the command 'ssh [email protected]'.
- Type 'yes' to continue connecting.
- Enter the default password: 'raspberry'.
- Configure your Raspberry Pi
- Open the network config file 'sudo nano /etc/dhcpcd.conf'.
Within the file, enable the following lines by removing the # from the front of each line:
interface eth0
static ip_address=XXX
static routers=YYY
static domain_name_servers=YYY ZZZ
Change XXX to the IP address you wish for your Rapsberry Pi to use on your network.
Change the two YYY to the IP address of your network's router.
Change XXX to your DNS of preference, e.g. 1.1.1.1
- Save the file you are editing.
- Change the default password by entering the command 'passwd'.
- Update your Raspberry Pi to have the latest firmware and patches by running this command 'sudo apt-get update && sudo apt-get upgrade -y && sudo apt-get autoremove && sudo apt-get autoclean'.
- When the updating is confirmed as completed, reboot your Raspberry Pi with the command 'sudo reboot'.
- Install Docker on your Raspberry Pi
- Connect to your Raspberry Pi at its new IP address.
- Download the Convenience Script to install Docker on your Raspberry Pi by running this command 'curl -fsSL https://get.docker.com -o get-docker.sh'.
- Run the Convenience Script with this command 'sudo sh get-docker.sh'.
- Add a user to Docker Docker Group by running the command 'sudo usermod -aG docker XXX' where XXX is the username you want, e.g. homeuser.
Install the Home Assistant Docker Container by running the following command. Note that this command is designed for Raspberry 4. If you are using another version, change the 'pi4' text within the command, e.g. change it to pi3.
docker run -d \
--name homeassistant \
--privileged \
--restart=unless-stopped \
-e TZ=MY_TIME_ZONE \
-v /home/pi/ha:/config \
--network=host \
ghcr.io/home-assistant/raspberrypi4-homeassistant:stable- Once Docker is confirmed as running, you should be able to access Home Assistant. Using a browser visit the URL for your installation using the IP address you configured in a previous step with the port code :8123. e.g. http://192.168.1.169:8123
- One limitation of installing Home Assistant in a Docker is its lack of an add-on store. For ease, install this separately.
- Open your SSH client and connect to your Pi.
- Run the command 'cd /home/pi/ha'.
- Run the command 'wget -O - https://get.hacs.xyz | bash -'.
- Configure the add-on store using these dedicated steps.
Home Assistant and its add-on store is now installed. Visit the dashboard in your browser using the configured URL and proceed to create an account and follow the in-browser prompts to complete installation.
Next steps
Once you have completed installation of Home Assistant OS your browser will take you to the Home Assistant dashboard. Now it's time to install autiomation functionality within Home Assistant. To do that, you'll need to setup Z-Wave 800 series with Home Assistant. Follow that link for our step-by-step guide.